CAD Lab Support
Plotting to the HP-T1300PS Plotter from AutoCAD
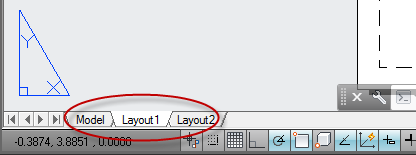
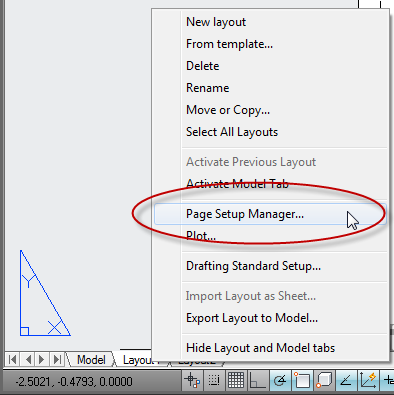
- Open your AutoCAD drawing. Click the Layout you want to plot to make it current, and then right-click on the Layout tab again.
- Select Page Setup Manager.
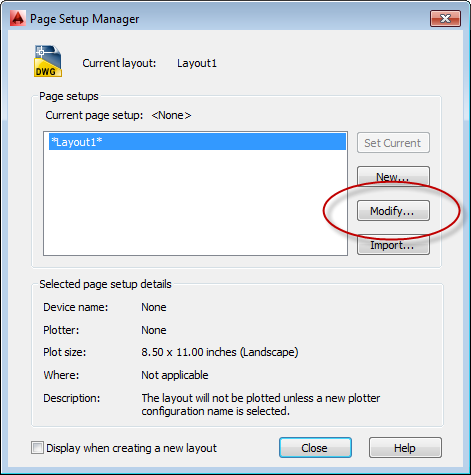
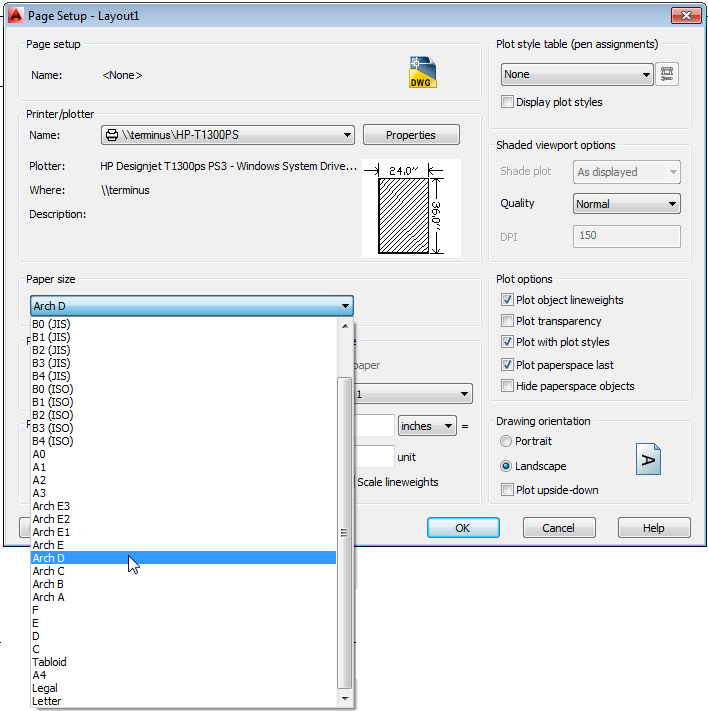
- In the Page Setup Manager dialog box, click Modify.
- On the Printer/Plotter Name pull-down list, select the HP-T1300PS plotter.
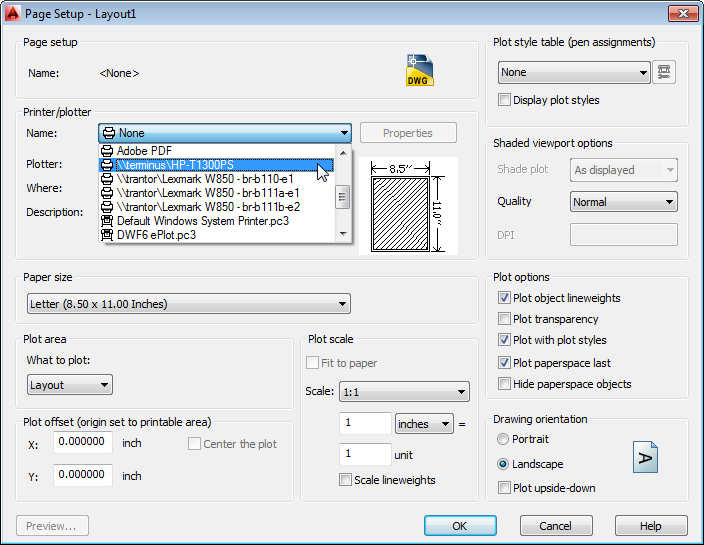
- Select your Paper Size.
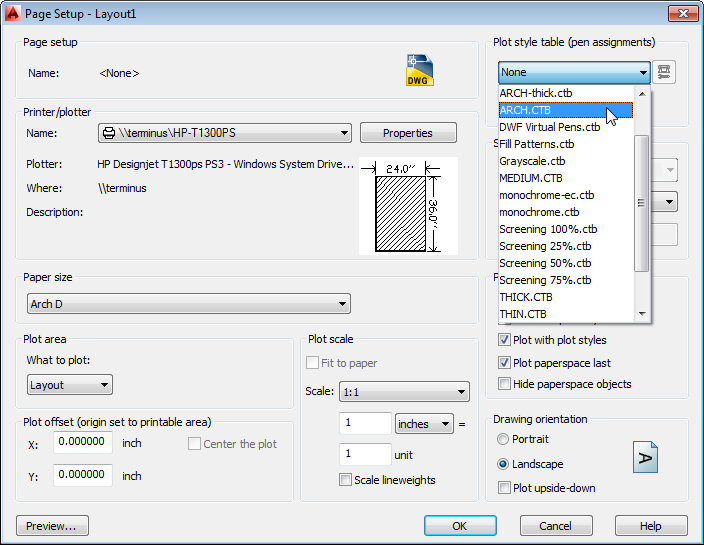
- Select your Plot Style. Click OK to save the page setup.
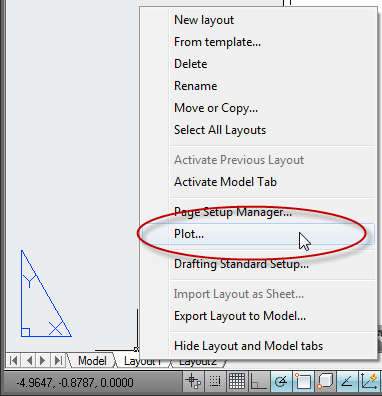
- Right-click the Layout tab. Click Plot.
Note: You can also select Print from the File Pulldown menu.
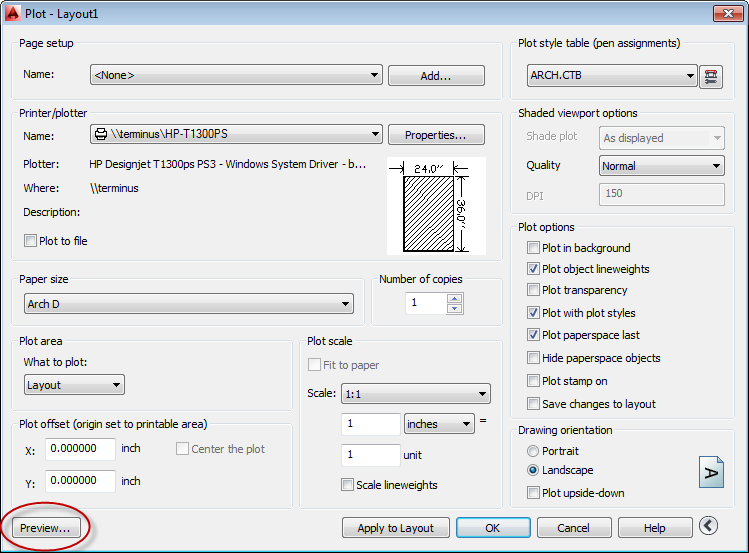
- Check the Plot settings. Make sure you click Preview and examine the preview. If everything looks correct, click OK to plot.
If the drawing does not plot correctly:
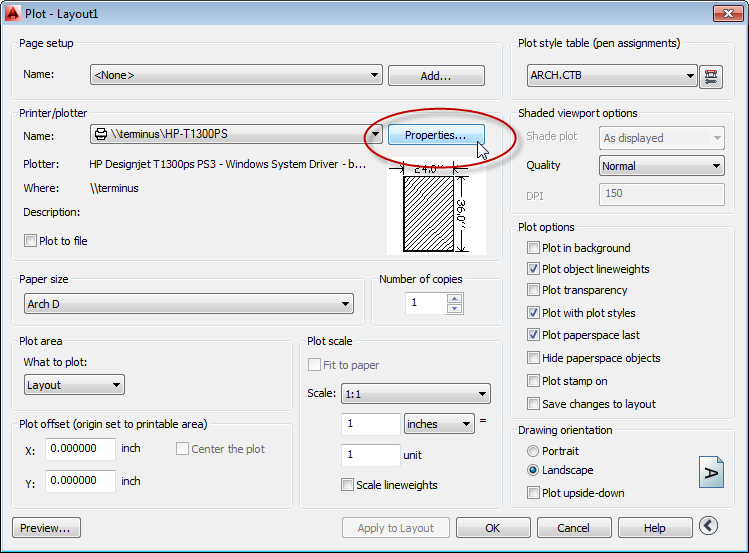
- If the drawing does not plot correctly, right-click on the Layout tab and then click Plot.

- On the Printer/Plotter Name pull-down list, select the HP Plotter. Click Properties (next to the Plotter name).
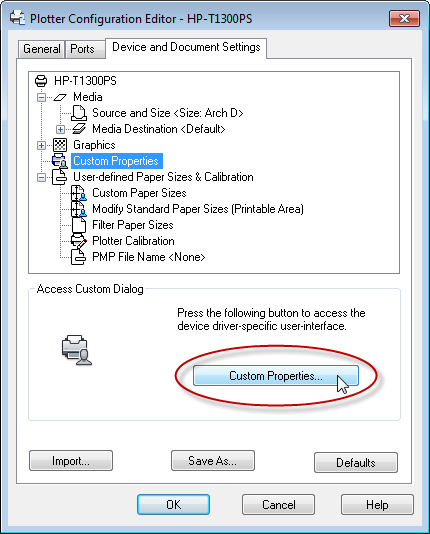
- In the Plotter Configuration Editor dialog box, click Custom Properties.
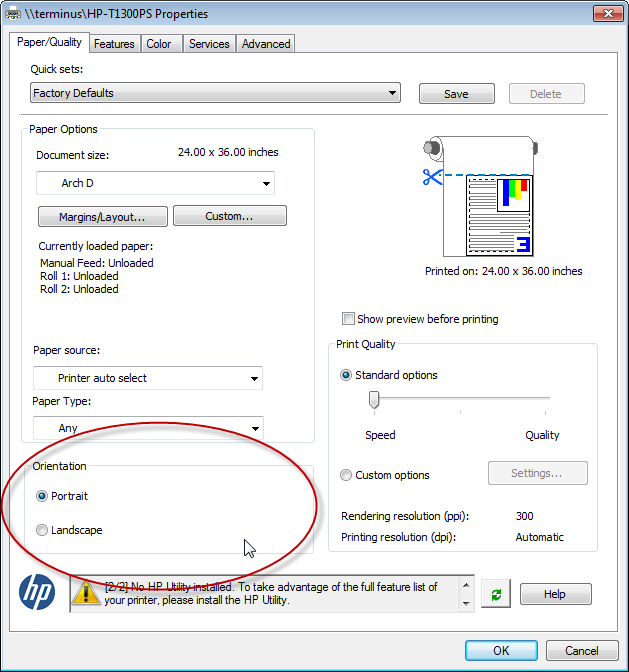
- In the Document Properties dialog box, on the “Orientation” drop down list, select “Portrait” and then click the “OK” button. Save the settings if you are prompted.
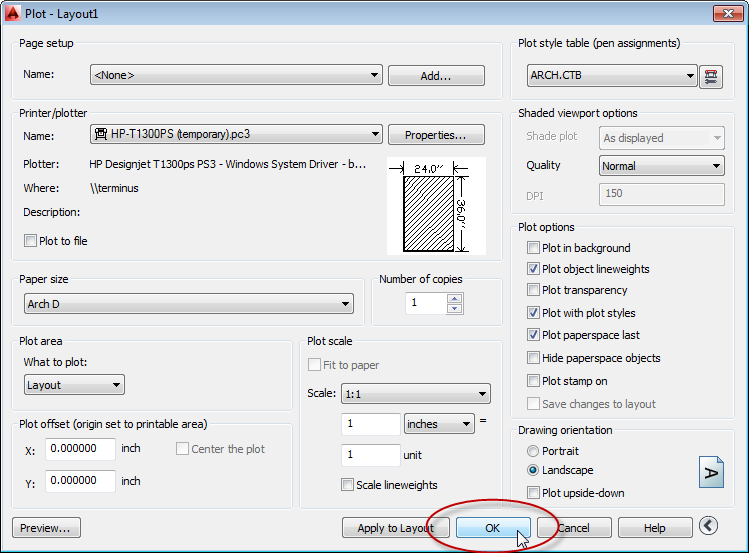
- In the Plot dialog box, click the “OK” button to plot.
|
Back to CAD Lab Main Page
Back to CAD Lab Support
|