CAD Lab Support
Windows 10 Laptop CAD Lab Printer Setup
|
To set up the
CAD Lab printers on a Windows 10 Laptop.....
- Click the Windows Start button or enter the Cortana Search bar.

- Type \\terminus.sheridanc.on.ca\MI-B414-E1 to setup the Lexmark black and white printer.

-
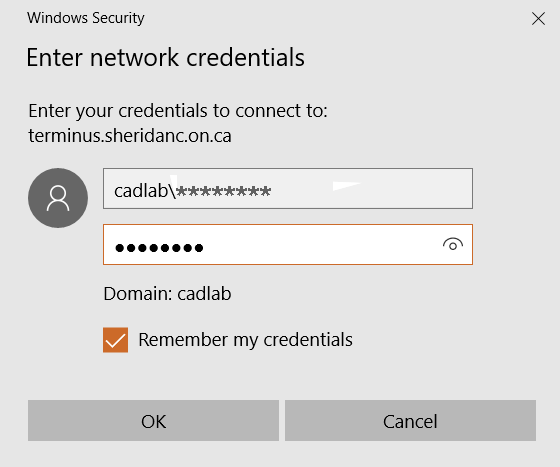
In the “Enter Network Credentials” window:
- for Username, enter: cadlab\********
where
******** is your CAD Lab login name.
- for Password, enter your CAD lab password.
- Check the “Remember my Credentials” box.
- Click OK.
- The “Windows Printer Installation” window will pop up and connect to the printer.
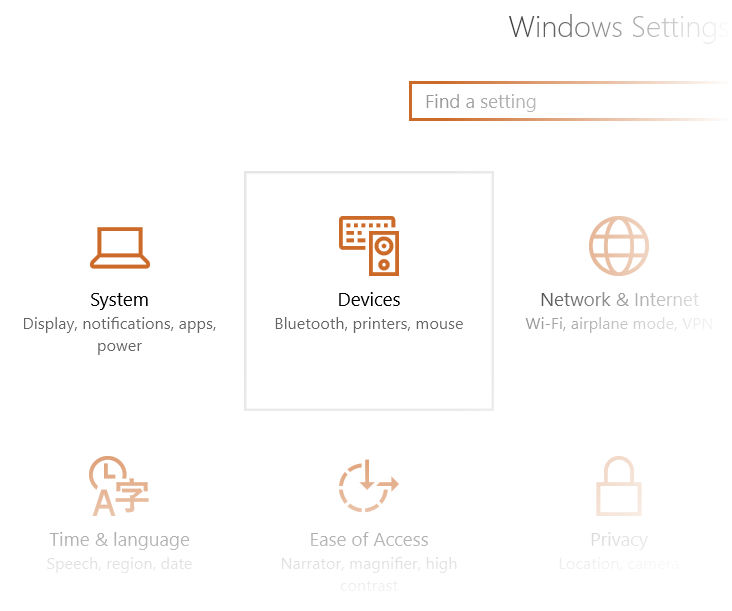
- Once you have connected to the first printer, connect the remaining printers/plotters by going into the Settings Menu > Devices.
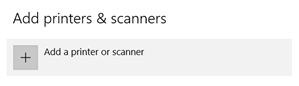
- Click “Add a Printer or Scanner”.
- Click Select a shared printer by name.
- Enter \\terminus\sheridanc.on.ca\
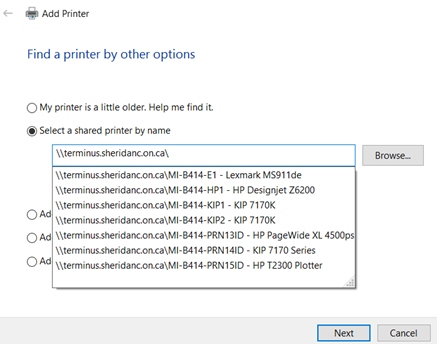
- Select the desired printer from the list. If the list does not appear, enter the desired server\printer name instead from the list below:
| CAD Lab small size laser printers*: |
| |
Lexmark MS911de |
\\terminus.sheridanc.on.ca\MI-B414-E1 |
| |
HP Colour Printer |
\\terminus.sheridanc.on.ca\MI-B414-E2 |
| |
|
|
| CAD Lab large format plotters** |
| |
KIP 7170K 1 |
\\terminus.sheridanc.on.ca\MI-B414-KIP1 |
| |
KIP 7170K 2 |
\\terminus.sheridanc.on.ca\MI-B414-KIP2 |
| |
HP Z6200 |
\\terminus.sheridanc.on.ca\MI-B414-HP1 |
- Once the printer/plotter is connected, click Next and then click Finish.
|
* The CAD Lab Printers ONLY support Letter (8-1/2" x 11") and Tabloid (11" x 17") paper. All other print jobs WILL BE DELETED!
**NOTE: Do not set the Large Format Plotters as your
default printers !
Back to CAD Lab Main Page
Back to CAD Lab Support