CAD Lab Support
Scanning using the Epson scanner in the Plotter room at HMC2
|
To scan with the Epson scanner.....
- Lift scanner cover and place document face down on the glass panel.
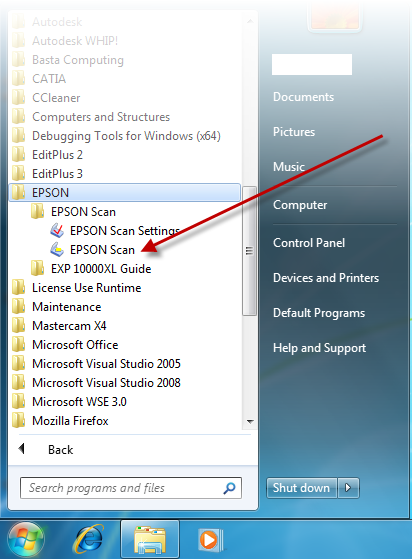
- Go to Start -> All Programs -> EPSON –> EPSON Scan –> EPSON Scan.
-
In the “EPSON Scan” window:
- for Image Type, select the desired type.
(Note: if you will attach the image in AutoCAD and trace it, then Black & White is recommended).
- for Destination, select the document size, orientation, and resolution.
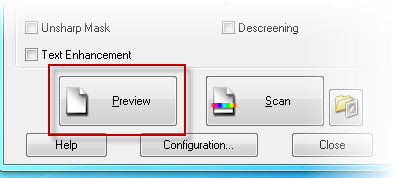
- Click Preview. Adjust the above settings and your document in the scanner if necessary.
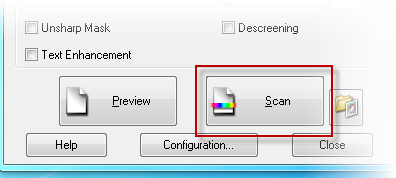
- Click Scan.
- In the File Save Settings dialog box:
- for Location,select My Documents, My Pictures, or Other and browse to a folder.
- for Filename, change the prefix if desired.
- for Image Format, select a type (Bitmap or Jpeg is recommended).
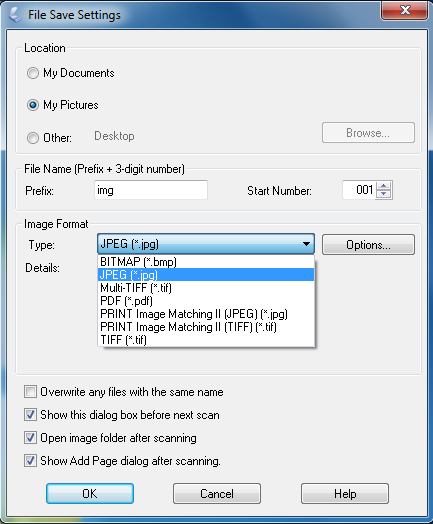
- Click OK to scan.
- REMOVE the Document from the scanner.
|
Back to CAD Lab Main Page
Back to CAD Lab Support