- manufacturing processes = artistry: Guilds and specific trades (in England, trade was called "plumbing").
- decorative metal cornices, metal-formed statuary elements, large metal claddings.
- practically, they all did the same thing: shed water away from the building.
- a small example of the TRUE meaning of modern architecture
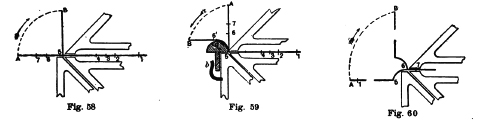
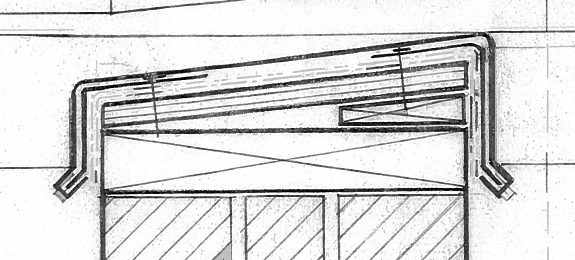
Above: early brake-forming techniques and resulting cornice metal-work.
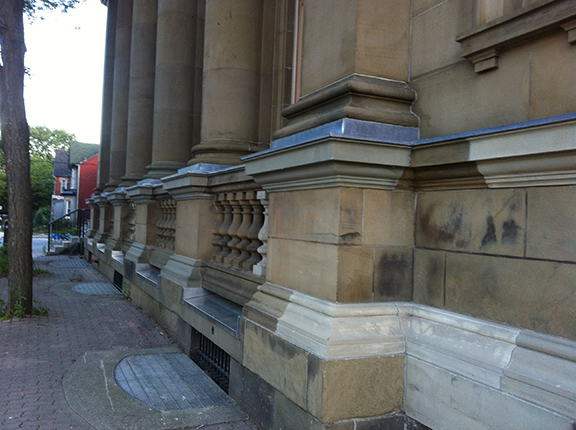
Above left: Ralph Thornton Community Centre (Toronto). Abutment and cornice flashing to protect the stone and horizontal ledges, formed with lead-coated copper.
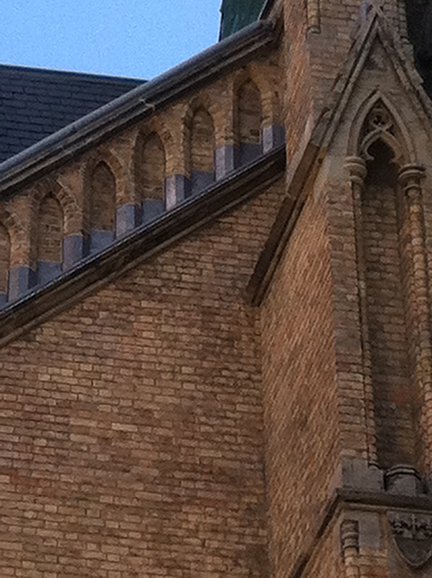
Above right: St. Michael's Cathedral (Toronto). Abutment and cornice flashings in lead-coated copper.
- metal flashing treatments are used to protect building components from premature wear, shed water away from the building, and provide for a finishing surface that other building components can connect or seal to.
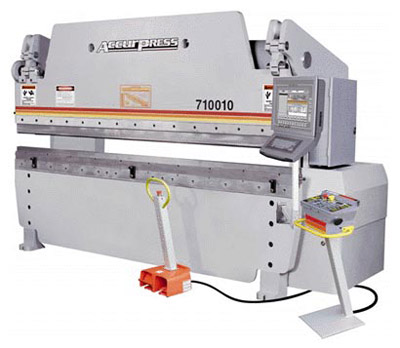
- breakform machines allow for large pieces of metal to be bent in perfect angles and straight edges. Used for fabrications in the shop.
- portable breakform machines are brought to construction sites for simple construction of eavestroughs and downspouts using pre-finished aluminum or pre-finished steel sheet.
- commercial metal trades can bend metal on a brake-form machine only as little as 20mm (3/4").
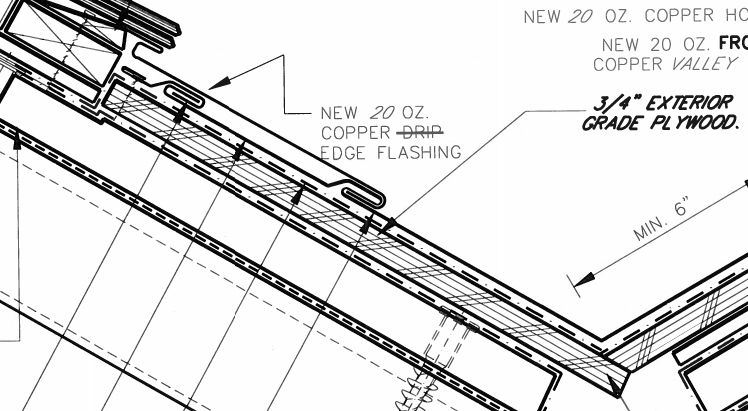
- a drip is formed by bending the metal downwards to a minimum 45 degree angle, and bending the metal again to form a "return".
- avoid cut edges of metal exposed to the elements: return metal to form a bent-edge finish.
- drip length should not be shorter than 20mm (3/4"): remember the capabilities of your commercial metal trades!

- a strip of metal installed first, before the main exposed flashing metal.
- acts as a fixing device for flashings.
- use when free edges of metal are susceptable to pullout from the finish surface.
- use similar metal types: dissimilar metals can be an issue (review the galvanic series of metals).
- notice the attachment points, and the wrapping of the drip for fixation.
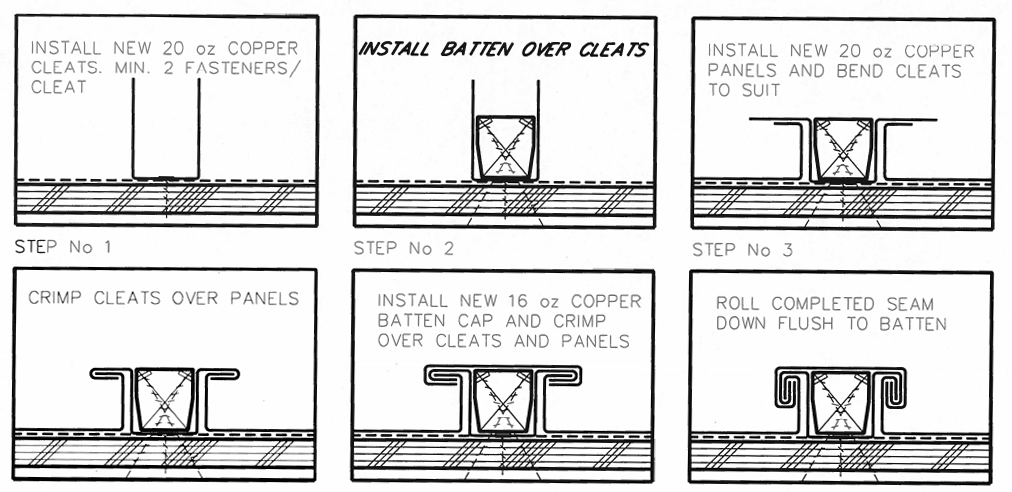
- not that you will have metal batten roofs installed in this manner, but the example below illustrates how a metal "hem" works.
- metal folding and "hooking" into another to join pieces of metal together.
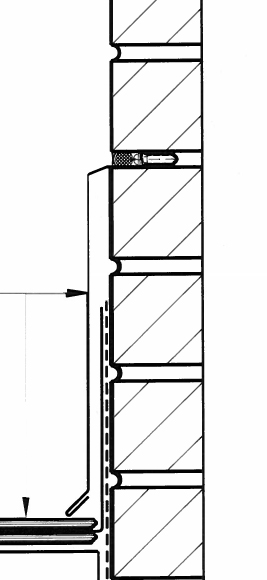
- when snow will gather, or metal transitions to another roofing system, metal flashings need room to expand.
- notice the clip at the top, and the mid-clip (receiver flashing) that a second metal piece locks into.
- when lengths of metal join, they need to meet without screw-fastening the metal, and hiding joinery for water-tightness.
- subsequent lengths slide into a folded portion that is fastened back to the substrate.
- NOTICE THE LACK OF FACE FASTENING: we do not want to have exposed screw/nail holes fastening flashings back to the substrate.


- the metal folds in on itself, returns down to get fastened to the substrate.
- a second piece of metal can slip inside the resulting metal fold.
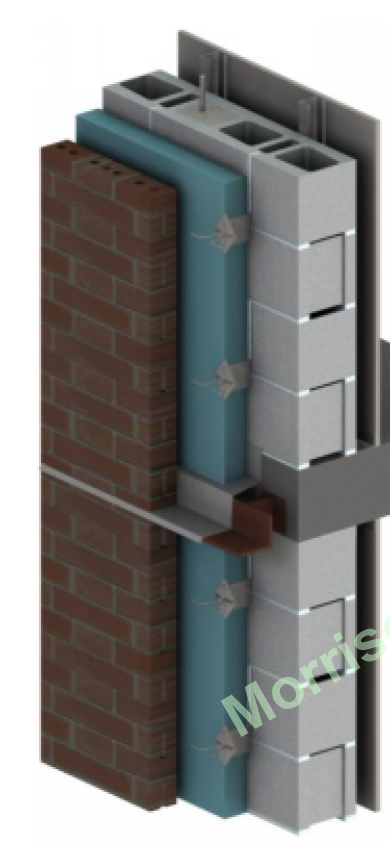
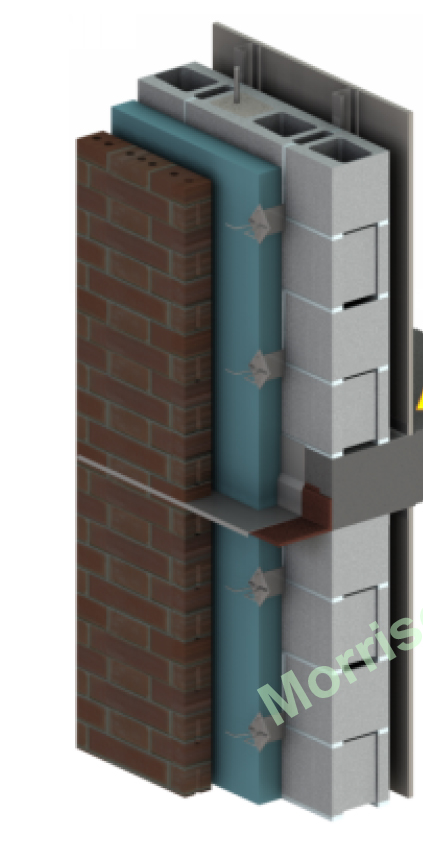
- minimizing thermal bridging means pulling as much metal facing away from the conductive surfaces. This includes dealing with steel shelf angles.
- terminating a metal flashing in a mortar joint or concrete means forming a reglet, and using light-duty masonry anchors to screw the metal into the joint.
- finish with backer-rod and sealant.
- need structurally flat surfaces for mounting metal. Prevents denting and cupping of metal. Plywood surfacing over stud framing ideal.
- use wood blocking/shims to create the slope back to the roof surface.
- wrap waterproof membranes over top to link with roof membrance.
- add a "separator sheet": something inert that will allow the metal to slide into place, will not melt underneath hot metal.
- starter strips, metal cap flashing.